Overview
Registration Links
Control who can register with personal links for invited guests or public links for open registration.
Personal links for your guest list. Public links for everyone else.
Invited guests get unique URLs with their info pre-filled. Open registration gives anyone a way in. Both work on the same event.
Personal Links
A unique URL for each guest with their name and email pre-filled. If someone else clicks it, they RSVP for the original guest.
Public Links
One link anyone can use. Post it on LinkedIn, embed it on your site, or print it as a QR code.
Personal Links (The Default)
Section titled “Personal Links (The Default)”Each guest gets a unique URL tied to their identity. If someone else uses it, they RSVP on behalf of the original guest. They do not create a new record.
How Personal Links Work
Every personal link contains a unique invite ID. When a guest clicks their link, Gatsby knows exactly who they are.
Pre-filled information
Name and email appear automatically. Guests confirm instead of re-typing information you already have.
Click tracking
See who opened their link and when. Even if they did not complete registration.
Conditional logic
Survey questions can adapt based on guest attributes. Ask executives different questions than their assistants.
Sending Personal Links
Personal links generate automatically when you send campaigns with the RSVP link merge field.
Via email campaigns
Insert the {rsvpLink} merge field in your campaign. Each recipient gets their unique link.
Manual delivery
Copy individual links from the guest list. Send via text, WhatsApp, or any other channel. Useful for last-minute VIP outreach.
Reuse the Same Link Throughout the Event
A personal link does not expire after the initial RSVP. The same link works for the entire lifecycle of your event.
Include the {rsvpLink} merge field in every email you send, not just the invitation. When you send the know-before-you-go email a week out and ask guests to confirm or update their details, that same personal link lets them make changes. If someone needs to cancel, switch their meal choice, or update a plus-one, they click the link they already have.
This means your guest always has one URL that takes them back to their registration. No new links to track. No “which email had the RSVP link?” confusion.
Generating Personal Links
-
Open your guest list.
-
Select the guests who need links.
-
Click Generate RSVP Links from the green action toolbar.
-
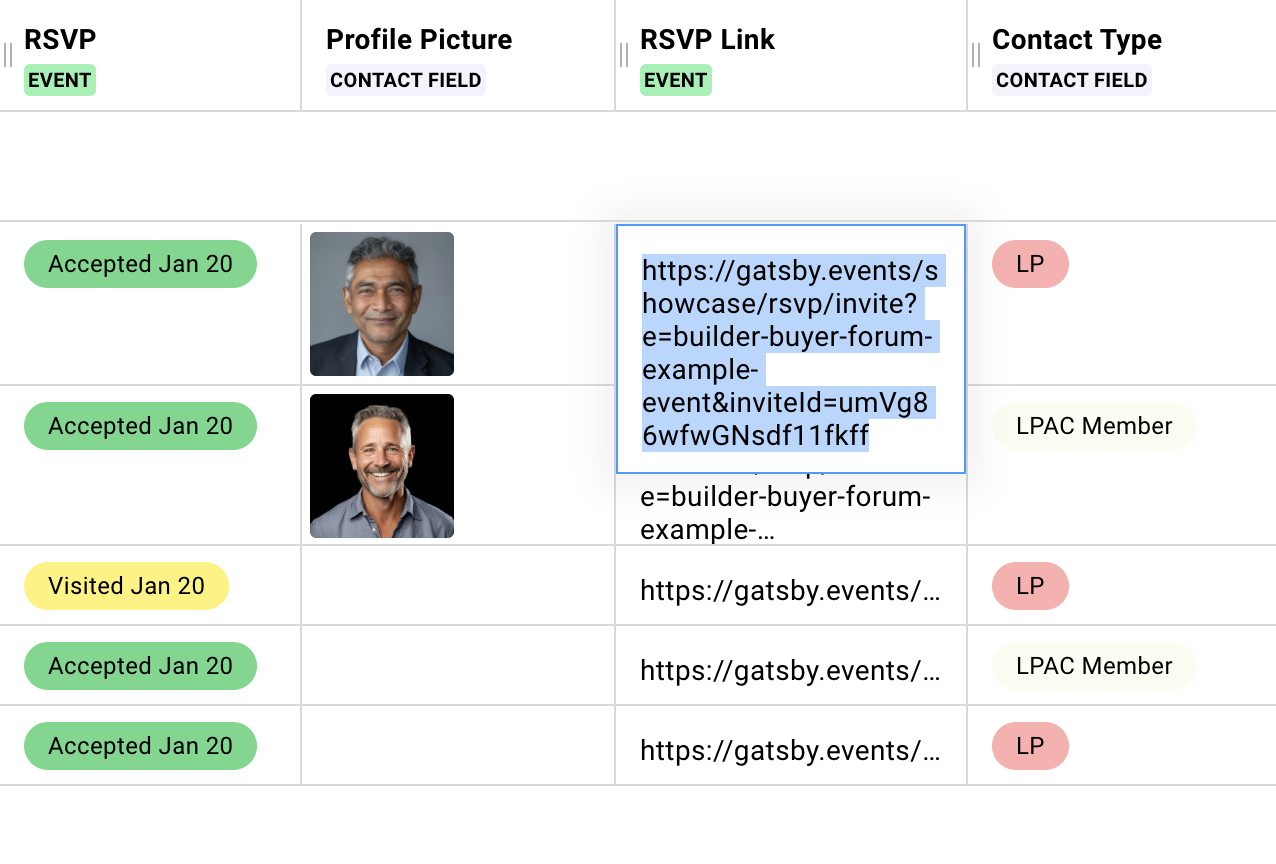
Links appear in the RSVP Link column on your guest list.
You can also show the RSVP Link column directly on your guest list to see all links at once.
Executive Assistant Workflow
Assistants often manage their executive’s calendar. Personal links handle this gracefully.
The assistant clicks the executive’s link. They complete the survey. The registration stays tied to the executive. Not the assistant.
Data stays clean. You know who is actually attending.
Enabling Public Registration
Section titled “Enabling Public Registration”Public links let anyone with the URL register for your event. No invitation required.
How to Enable
-
Open your event’s RSVP tool.
-
Find the gray Public Link button at the top.
-
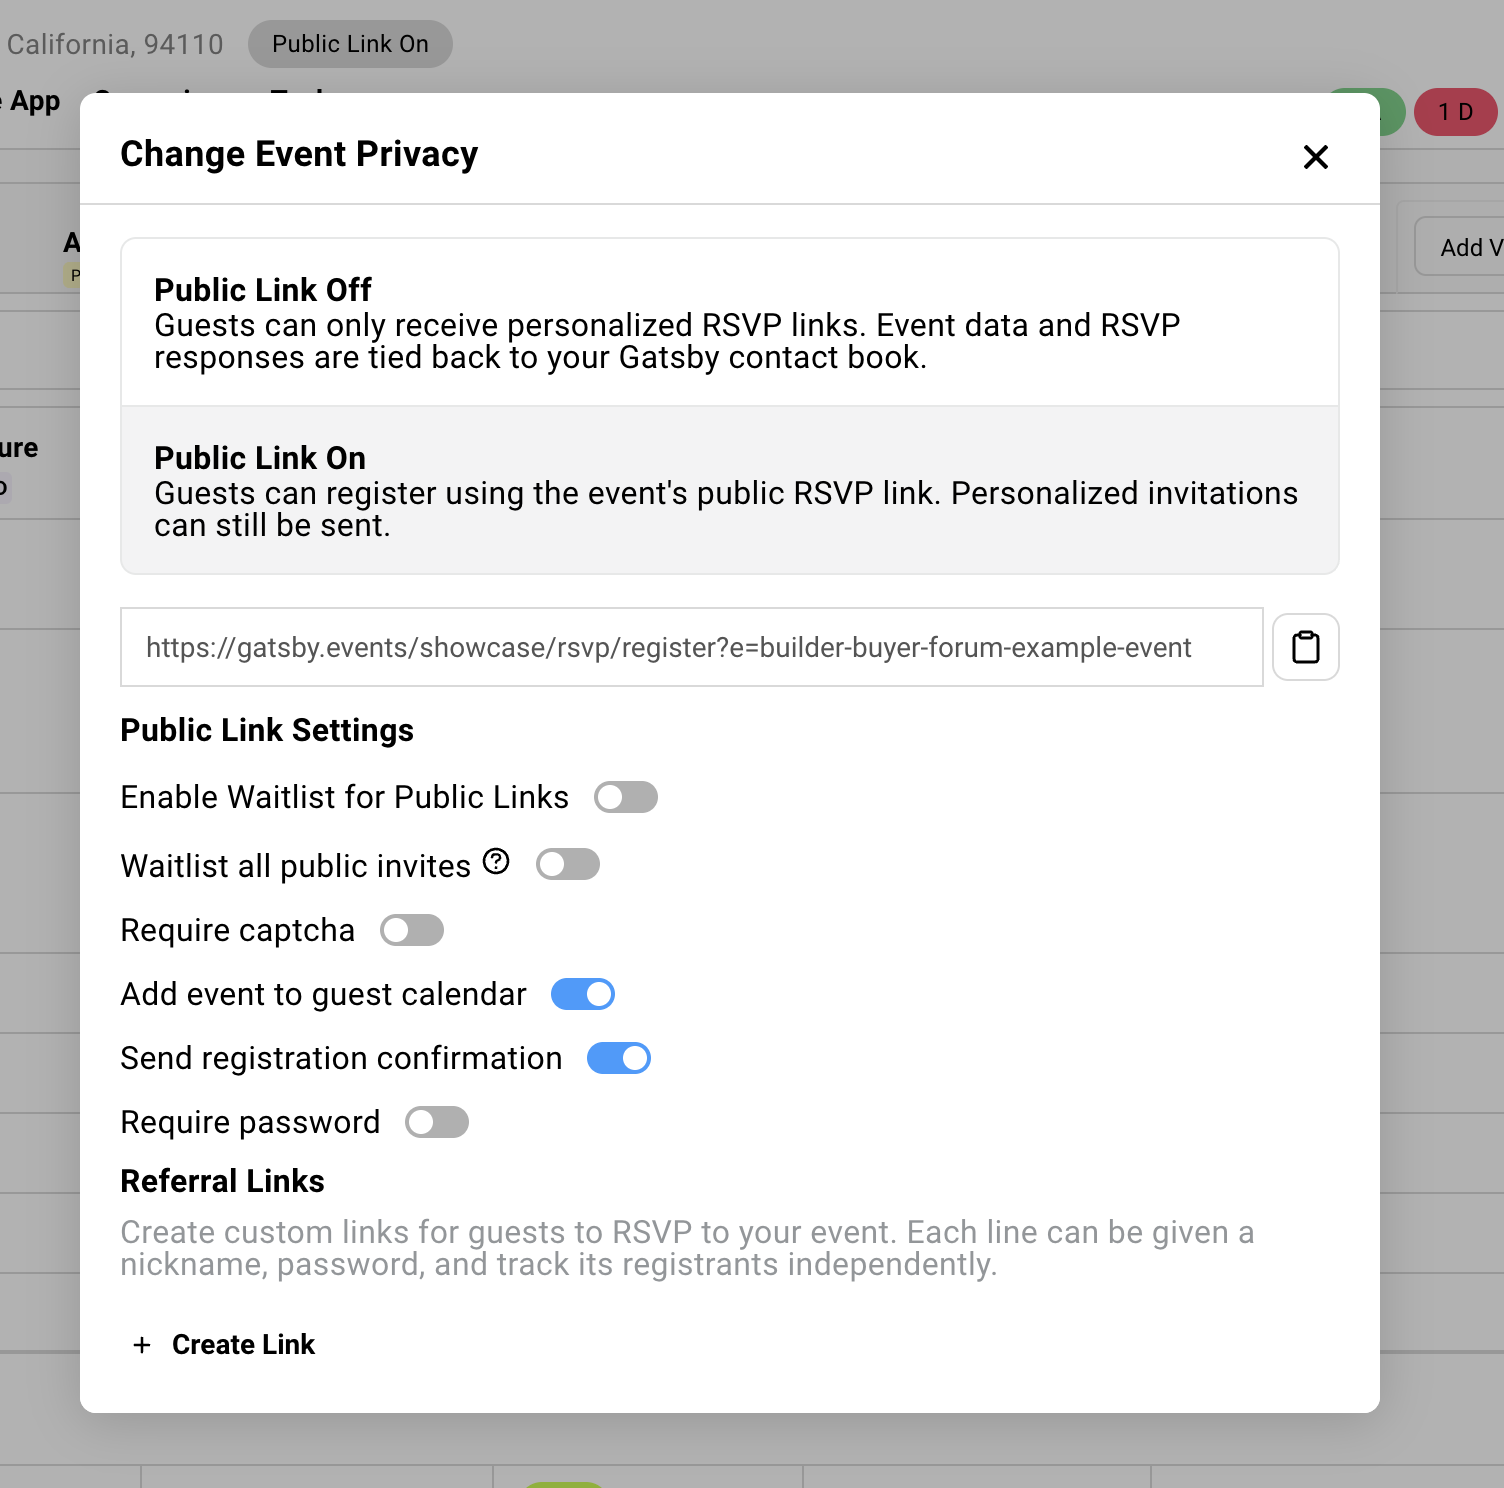
Toggle it on.
-
Copy the public link that appears.
The link works immediately. Anyone with the URL can register.
Testing Public Links
-
Copy your public link.
-
Open it in a new browser tab or incognito window.
-
Complete the full flow to see what guests experience.
This shows you exactly what public registrants see. Survey questions, confirmation screens, everything.
Public Link Options
Section titled “Public Link Options”Public registrants can follow a separate path. You can configure their experience differently from invited guests by requiring approval to attend using Gatsby’s Waitlist functionality.
Waitlist (Approval Required) for Public Registrants
Send all public registrations to the waitlist for manual approval. Essential for curated events where you want to vet attendees before confirming.
See Capacity and Waitlists for approval workflows.
Waitlist All Public Link Invites
By default, if someone registers with an email that already exists on your guest list, Gatsby matches them and approves automatically.
Enable this to waitlist them anyway. Useful when you want to confirm intent even from known contacts.
Add to Guest Calendar
Toggle whether public registrants receive calendar invites attached to the confirmation email. Recommend keeping this turned on.
Send Registration Confirmation
Toggle whether to send your confirmation/notification email. If enabled, public registrants receive either the Waitlist or Confirmation email depending on your settings. Recommend keeping this turned on.
Require CAPTCHA
Prevents bot spam. Enable if you are posting links publicly on social media or your website.
Require Password
Add a layer of access control without generating personal links. Share the password with specific groups. Anyone with the link but not the password cannot register.
Enable Decline for Public
Off by default. Most people will not fill out a form just to say no.
Enable if you are directing existing contacts to the public link and want to track who cannot attend.
Referral Links
Section titled “Referral Links”Track where registrations come from. Create different links for different channels or co-hosts.
What Referral Links Are
Public link variants with source tracking. The URL includes a UTM parameter that identifies where the registration came from.
Same registration experience. Different attribution.
Creating Referral Links
-
Open your public link settings.
-
Click Create Referral Link.
-
Name the source (e.g., “LinkedIn” or “Partner-ABC”).
-
Copy the generated link.
Each referral link has a unique source identifier that lives as a column on the guest list: “Referral Link”.
Viewing Referral Data
The referral source appears in a column on your guest list: “Referral Link”.
Filter and sort by source to see which channels drive the most registrations.
Use Cases
Channel tracking
Different links for LinkedIn vs Instagram vs email newsletter. See which platform performs best.
Co-host attribution
Different links for each co-host or partner. Track who drives the most registrations.
Campaign comparison
Different links for different email sends. Compare early invite performance to reminder performance.
How Link Type Affects Registration
Section titled “How Link Type Affects Registration”Personal and public links are technically on a seperate registration path. You can control which buttons show and which survey questions appear for each one.
Different Buttons for Each Path
Public RSVPs can have Decline disabled while personal RSVPs show it. Configure visibility separately for each path.
Find these settings on the Invite Landing Page preview screen. The right sidebar shows separate options for public and private registration.
Different Survey Questions
Show certain questions only to public registrants. “How did you hear about us?” makes sense for self-registrants. Not for guests you personally invited.
Show other questions only to invited guests. VIP-specific questions or internal tracking fields.
This requires you to have the waitlist enabled for public links and set filtering by RSVP type on survey questions.
See Forms and surveys. for conditional question setup.
The Public Label
Public registrants show up on your guest list with gray “Public” text next to their name.
Easy to identify who added themselves versus who you invited.
Test Links
Section titled “Test Links”Preview the registration experience without saving data. Useful for design checks. Don’t send to real guests.
What Test Links Are
Preview-only links that do not save information. Not tied to any guest. Show a green “This is a preview” bar at the top.
What You Cannot Test
- Auto-fill does not work. You will not see pre-filled name and email.
- Confirmation emails do not send.
- Calendar invites do not attach.
- Conditional survey logic based on guest attributes does not fire.
Test links show you the page. They do not replicate the full guest experience.
The Test Link Trap
If you only test with test links, you may issues and touchpoints.
Add yourself as a guest. Use your personal link. Complete the full flow. That is the real experience.
Where Test Links Appear
Sent automatically when you preview from campaigns. Also accessible from the RSVP tool preview screen.
View-Only Links
Section titled “View-Only Links”Share your landing page without enabling registration. RSVP buttons are visible but do nothing when clicked.
How to Get One
-
View your landing page templates.
-
Click the dropdown arrow next to the Edit button.
-
Select Get view-only link.
Use Cases
Design review
Share with your team before going live. Get approval without enabling real RSVPs.
Parking and logistics
Link to a logistics page from your confirmation email or a campaign email.
Speaker bios
Create a standalone page with speaker information. Share or embed anywhere.
Live agenda at event
QR code at the venue linking to an agenda you can update in real time. Changes reflect immediately.
Common Questions
Section titled “Common Questions” Can I switch between public and private after launch?
Yes. Toggle anytime via the Public Link button. Existing personal links continue to work. You are adding an option, not replacing one.
What happens if someone forwards a personal link?
The new person RSVPs on behalf of the original guest. They do not create a new record.
For true self-registration, share the public link instead.
We want to post on LinkedIn to gauge interest. How?
Enable the public link. Enable waitlist for public registrations. Customize the button text to “Register Interest.”
Approved guests get a follow-up with full access. See Capacity and Waitlists for the approval workflow.
Can I use my own domain for links?
Yes. The custom domain add-on lets links come from your domain instead of Gatsby’s. Contact your account manager for setup.
How do I prevent duplicates from public registration?
Gatsby matches by email address. If someone registers with an email already in your database, we update the existing contact rather than creating a duplicate.
What about events with security clearance requirements?
Use waitlist mode. Registration means “application submitted,” not “confirmed attendance.”
Your security team reviews the guest list and approves individually. See Capacity and Waitlists for approval workflows.
What are Personal vs Public Links?
Personal Links: Unique per guest. Pre-filled with their info. One-click RSVP. Trackable. Non-transferable.
Public Links: One link for everyone. Empty form. Good for social media, website embed, QR codes.
Events can use both. Personal links for your curated list. Public link for discovery.
Can't track where registrations came from
Referral Links let you track registration sources.
Public Link settings » Referral links » Create Link. Add a label like “LinkedIn” or “Newsletter”. Each referral link tracks separately.
View “Referral Link” column on guest list to see where each registration came from.