Overview
Capacity & Waitlists
Control who registers and when. Set capacity limits, require approval through waitlists, and manage plus-ones so your headcount stays accurate.
Let some people register immediately while vetting everyone else
Exclusive events need selective admission. LPs bring spouses but associates cannot, unknown registrants need vetting, and capacity changes as people register. An on/off switch doesn’t handle this.
Automatic Triggers
Hit your limit and registration switches to waitlist. No manual intervention.
Per-Guest Plus-Ones
Set individual limits per guest. Real-time headcount includes plus-ones.
Registration Modes
Section titled “Registration Modes”Most tools give you binary control. Open or closed. But exclusive events need something in between.
Some people should register immediately while others get vetted. Registration needs to adapt as capacity fills, which means more than an on/off switch.
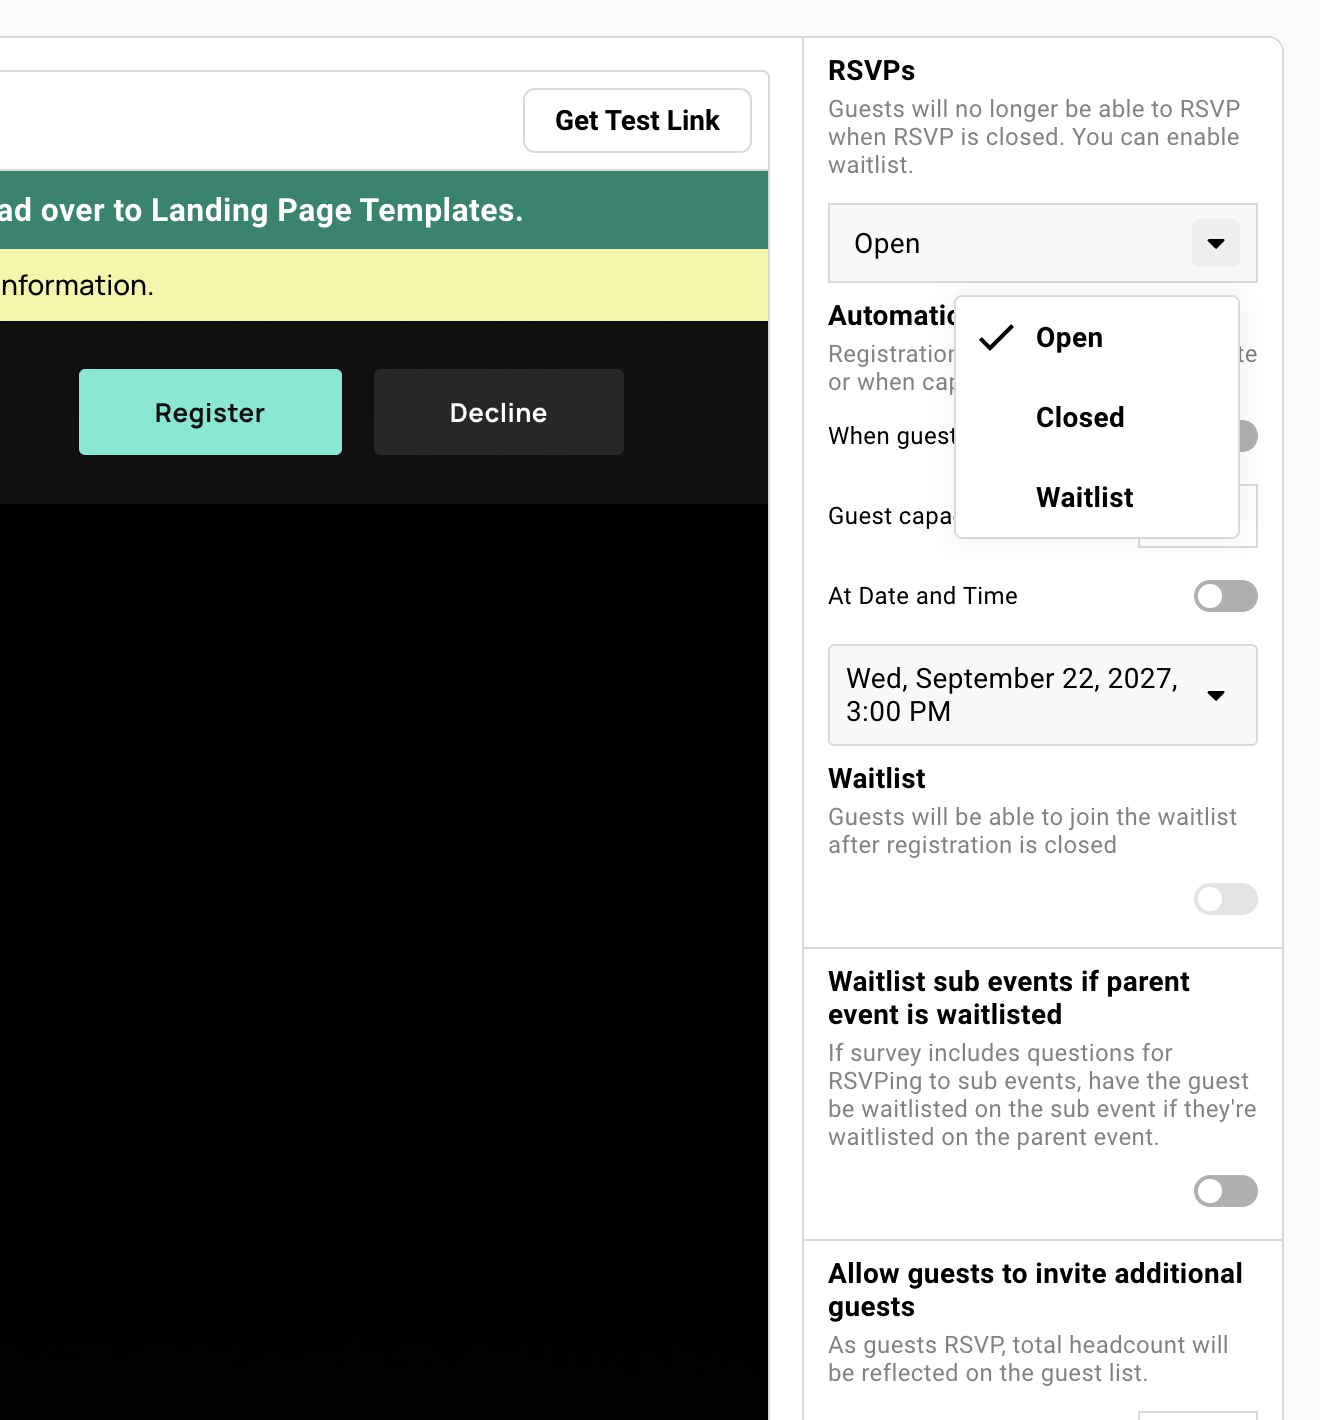
Registration mode controls what guests see and what happens when they click buttons. Find this setting in the RSVP tool dropdown on the right side of your landing page preview.
Open
Registration is available. Guests can RSVP immediately. This is the standard flow for most events.
When a guest clicks Accept, their status changes to Accepted. When they click Decline, their status changes to Declined.
Closed
No new RSVPs accepted. Guests who already registered can still modify their responses. Your landing page shows a closed state.
Use this when registration is complete and you want to lock in your guest list.
Waitlist
All registrations require your approval. When guests register, their status is set to Waitlisted instead of Accepted.
The button on your landing page can say anything. “Apply to Attend.” “Register.” “Request Invitation.” Guests do not have to see the word “waitlist.”
Capacity and Deadline Triggers
Section titled “Capacity and Deadline Triggers”Set registration to automatically switch to waitlist when you hit a capacity limit or reach a deadline. Whichever comes first.
Capacity Limits
Maximum number of acceptances allowed. When reached, new registrations go to waitlist instead of closing entirely.
The count includes plus-ones since they appear as separate entries on your guest list. A 40-person capacity with 30 primary guests and 15 plus-ones means you are over capacity.
Account for internal team members if they are on the list.
Registration Deadlines
Date and time when registration behavior changes. You can either close entirely or switch to waitlist mode.
Useful for events with venue deadlines or catering cutoffs. Guests who miss the deadline can still request a spot through the waitlist.
How These Work Together
Toggle on both capacity and deadline triggers. Whichever condition hits first wins.
Example: 50-person capacity with a Friday deadline. If you hit 50 on Wednesday, waitlist activates Wednesday. If Friday arrives with only 40 guests, waitlist activates Friday.
Public Link Waitlist
Section titled “Public Link Waitlist”Require approval only for guests who find you through a public link. Invited guests using personal links register immediately.
How to Enable
-
Open your event’s RSVP tool.
-
Enable the public link.
-
Toggle Enable Waitlist for Public Links to On.
Personal link guests register normally while public link guests go to the waitlist.
When to Use This
Grow your network while protecting your event. Post on LinkedIn but vet unknown registrants.
Known contacts get instant confirmation with a calendar invite. Unknown contacts apply and you review them before they get access.
Full Waitlist from Start
Section titled “Full Waitlist from Start”When every registration needs approval. Creates an “Apply to Attend” experience regardless of link type.
How to Enable
-
Open your event’s RSVP tool.
-
Set the registration mode dropdown to Waitlist.
All guests must be approved before their status changes to Accepted. Personal links, public links, it does not matter. Everyone goes through your approval workflow.
When to Use This
Curated events where the guest mix matters. You need the right combination of industries, seniority levels, or companies at the table, and not everyone who applies gets in.
Security-sensitive events requiring verification before admission. Government clearance checks, background verification, or identity confirmation.
Reviewing Waitlisted Guests
Section titled “Reviewing Waitlisted Guests”Waitlisted guests appear in your guest list with a pink “waitlisted” tag. Create a filtered view to see them all in one place.
Creating a Waitlist View
-
Open your guest list.
-
Click Add Filter.
-
Set RSVP status equals Waitlisted.
-
Save as a view for quick access.
Now you have a dedicated workspace for pending approvals. No scrolling through your entire guest list.
Information Available for Review
Three types of information are available for each waitlisted guest.
Survey responses
Answers to your registration questions. Industry, company, role, how they heard about you.
Contact profile
Company info, custom fields, notes from previous events.
External verification
Cross-reference with LinkedIn or your CRM before deciding.
Approving Guests
Section titled “Approving Guests”Change RSVP status from Waitlisted to Accepted. The system asks if you want to send a confirmation email.
Standard Approval Flow
-
Select the guest in your guest list.
-
Change their RSVP status to Accepted.
-
Click Yes when asked about confirmation email.
Guest receives your confirmation email with the calendar invite attached (if configured). One status change handles the approval and the notification.
Custom Approval Flow
-
Select the guest in your guest list.
-
Change their RSVP status to Accepted.
-
Click No to skip the automatic email.
-
Send a personalized campaign instead.
More control over messaging. Include their RSVP link, calendar invite, and any event-specific details. Useful when the standard confirmation email does not fit the situation.
Guests You Will Not Approve
Section titled “Guests You Will Not Approve”Do not change waitlisted guests to Declined. Leave them in waitlist status.
Why Not Decline Them
If you decline a waitlisted guest, the system no longer remembers they were waitlisted.
Next time they visit their registration link, they see Accept and Decline options. They can mark themselves Accepted. You lose control.
This is not a bug. It is how the status system works. Declined means “guest chose not to attend.” Not “host rejected application.”
The Right Approach
Leave unapproved guests as Waitlisted. Their status stays locked.
If you need to communicate rejection, send a campaign. Personal, professional, on your terms.
Consider adding a custom column like “Approved: Yes/No” to track your internal decision. Filter by that column to separate approved guests from pending and rejected. The RSVP status stays Waitlisted either way.
Never change a waitlisted guest to Declined. Leave them as Waitlisted and send a separate communication if you need to inform them.
Plus-One Settings
Section titled “Plus-One Settings”A single plus-one setting for every guest does not work for exclusive events. Giving everyone the same allocation means LPAC members cannot bring spouses, or associates bring friends to a board dinner.
You need granular control per guest.
Start with a global default, override it per guest, and require email addresses to capture plus-one info for future events.
Global Default
Set in RSVP settings under “Allow guests to invite additional guests?”
Choose the default number. Zero means no plus-ones unless you override. One means everyone gets one unless you override.
Decide whether email addresses are required. Required email means you capture the plus-one as a real contact. Optional means you might get “Guest of John” with no contact info.
Per-Guest Overrides
-
Open your guest list.
-
Add the Plus Ones Allowed column.
-
Set specific numbers for each guest.
LPAC members get 1. GPs get 2. Everyone else gets 0. Each guest sees only their allocation when they register.
Why Require Email Addresses
When required, plus-one info syncs to your contact database. Name, email, dietary restrictions. They become known contacts for future events.
Without required email, plus-ones are anonymous. You know someone is bringing a guest. You do not know who. Next quarter, you start from scratch again.
How Plus-Ones Count Toward Capacity
Each plus-one is a separate entry on the guest list. They count against capacity.
A 40-person capacity with 30 primary guests and 15 plus-ones means you are at 45. Five over capacity.
Plan accordingly. If you give 30 guests one plus-one each, your theoretical maximum is 60 people.
Parent-Child Event Behavior
Section titled “Parent-Child Event Behavior”When using event families (parent event with child sub-events), waitlist and plus-one settings cascade.
Waitlist Cascade
If the parent event is in waitlist mode, guests registering through the parent also get waitlisted on child events they select.
This applies to public link registrations. A guest finds your parent event on LinkedIn, registers, and selects three breakout sessions. They are waitlisted on the parent and all three children.
Plus-One Cascade
Plus-one settings from the parent apply when guests add plus-ones during registration. If the primary guest is waitlisted, their plus-ones inherit that status.
Plus-ones do not bypass the approval workflow.
Learn More
See Event Families for full parent-child documentation, including how to set up multi-day conferences and central registration dashboards.
Common Questions
Section titled “Common Questions” Can I hide that guests are on a waitlist?
Yes. The button on your landing page can say anything. “Register.” “Apply to Attend.” “Request Invitation.” Guests do not need to see the word “waitlist.”
The waitlist notification email can also be customized. Frame it as “application received” instead of “you are on a waitlist.”
What happens when someone registers who is not in Gatsby yet?
Their information gets added to Gatsby automatically. As long as they complete the required survey questions on the registration page, they become a contact in your database.
Do plus-ones receive confirmation emails?
Yes, if your guest provides their plus-one’s email address. Gatsby sends them a separate confirmation email with the event details.
Is plus-one information saved for future events?
Yes. All plus-one details sync to your organization’s contact database. They appear in the Plus Ones column on your guest list and become known contacts for future events.
Do waitlisted guests receive an email?
Yes. Configure the waitlist notification email in the RSVP tool. It can include different information than the confirmation email. Calendar invite is not attached by default.
See Notification Emails for configuration details.
What if a waitlisted guest decides they cannot attend?
They can decline themselves. Their status changes to Declined. This is rare, but possible. Most guests simply do not respond.
How do I see my current capacity status?
At the top of your event, colored badges show how many guests are Accepted, Declined, Waitlisted, Invited, or have no status.
Those badges give you a quick count without adding anything up.
We want to post our event on social to allow people to register their interest
Enable the Public Link with Registration Mode set to Waitlist. Anyone with the link can register, but they land on your waitlist for approval.
Can I require approval for all registrations?
Yes. Set Registration Mode to “Wait for approval” (or Waitlist). Every registration goes to the waitlist regardless of how they register.
You manually move guests to Accepted when ready.
How do I approve waitlisted guests?
Change their RSVP status from Waitlist to Accepted. They can automatically receive the confirmation email with calendar invite, or you can notify manually.
Bulk approval: Select multiple guests » Actions » Change Status » Accepted.
Need to close registration immediately
RSVP settings page
- Change from RSVP “Open” to “Closed”
Public Link
- Click the public link settings at the top of your event » Set public link off